Install Windows 11 on Steam Deck (MicroSD)
A complete guide to running Windows 11 from a MicroSD card on your LCD or OLED Steam Deck, with no PC required.
📌 Key Takeaways
- No PC Required: Everything is done directly on the Steam Deck.
- Fully Updated: The image includes the latest Windows updates and pre-injected drivers for both LCD and OLED models.
- Safe: This runs entirely off the MicroSD card and does not wipe your SteamOS installation.
Transparency Note: As an Amazon Associate I earn from qualifying purchases. This means if you click a link and buy something, I may receive a small commission at no extra cost to you.
Success with this guide depends heavily on the speed of your MicroSD card. I highly recommend using A2 V30 rated cards OR a NVMe enclosue for the smoothest Windows experience.
Recommended MicroSD Cards/NVMe enclosure:You will need these files to complete the guide:
1. Balena Etcher (Linux x64)Download the W11 Image from one of these mirrors:
NerdZap Windows 11 Image (Google Drive) NerdZap Windows 11 Image (OneDrive) NerdZap Windows 11 Image (Archive.org)Step 1: Preparation & Desktop Mode
- Remove your current MicroSD card containing your Steam games to keep it safe.
- Insert the target MicroSD card you wish to use for Windows.
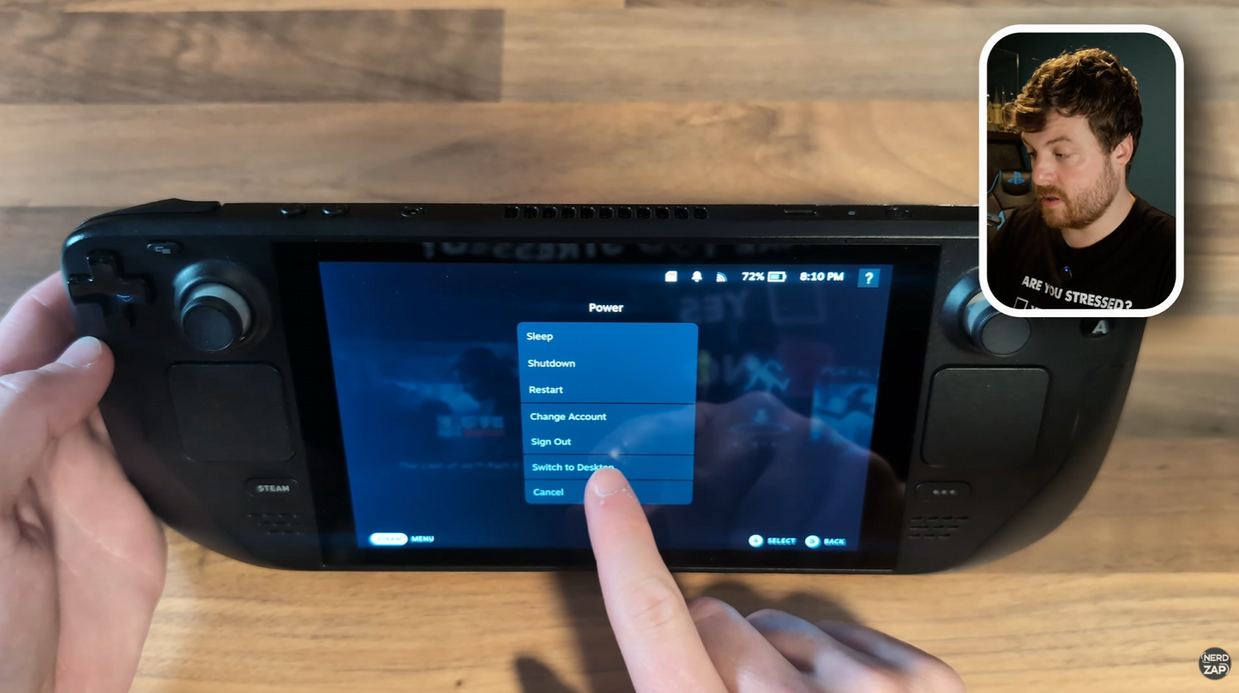
- Hold the Power Button and select Switch to Desktop.
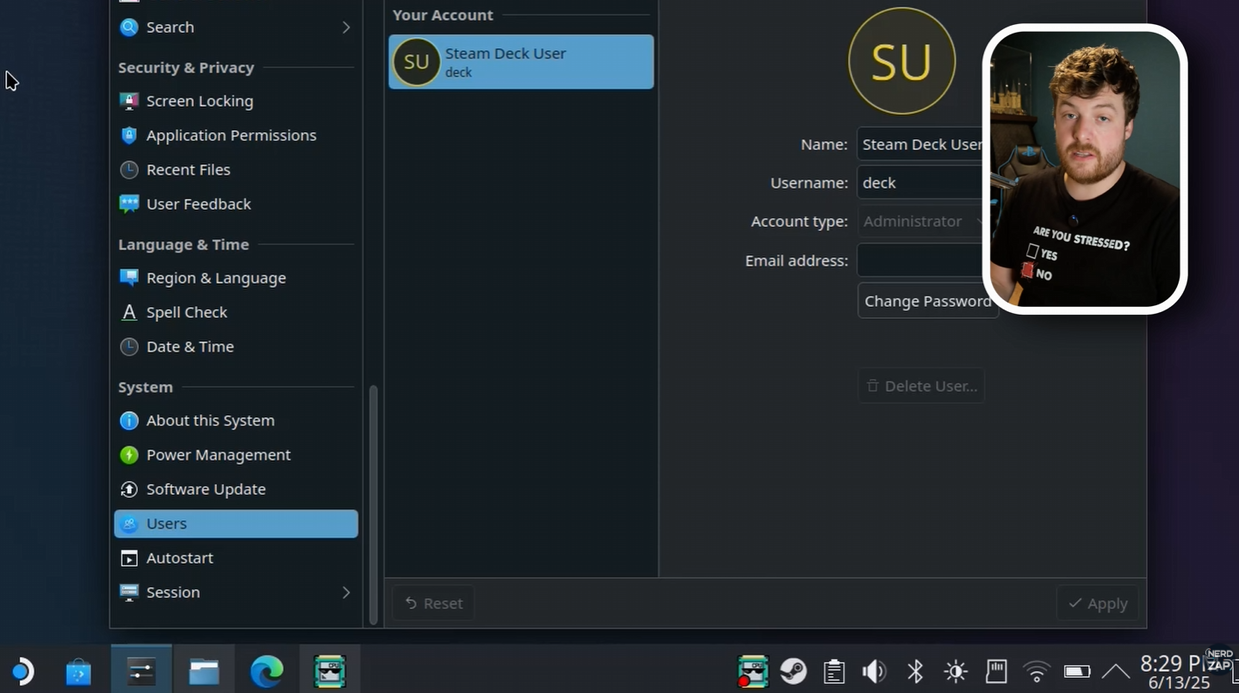
Step 2: Set Super User Password
You need a password to install software in Desktop Mode. If you haven't set one:
- Open the System Settings or click the Steam Deck User icon in the menu.
- Select Change Password (or Set Password).
- Create a password and write it down; you will need it shortly.
Step 3: Download Tools & Image
Open a web browser on your Deck and download the required files listed in the Downloads section above.
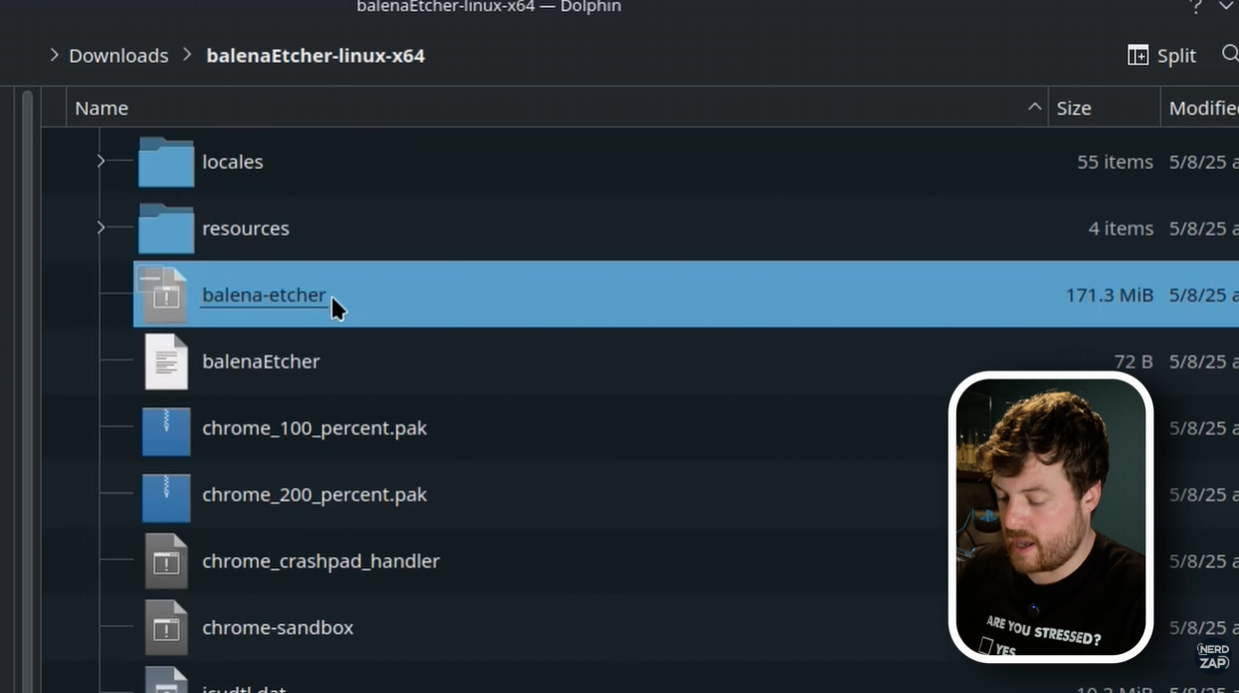
Once downloaded, open your file manager, find the Etcher zip in Downloads, and right-click > extract it.
Tip: Note: You do NOT need to extract the NerdZap W11 file. Etcher will accept the .zip
Step 4: Flash the Image
⚠️ Warning: This step will wipe all data on the MicroSD card you use for Windows.
- Open the extracted Etcher application.
- Select Flash from File and choose the NerdZap Windows 11 image.
- Click Select Target.
- CRITICAL: Carefully select your MicroSD card. Ensure you do not select the internal Steam Deck drive.
- Click Flash. You will be prompted to enter your Super User password.
Tip: If you get an error immediately, try typing your password faster. The prompt can time out quickly.

Step 5: Booting into Windows
- Once flashing is complete, shut down your Steam Deck.
- Hold the Volume Down button and press the Power Button. Keep Volume Down held until you hear the chime.
- In the boot menu, select the MicroSD Card.
The initial boot may take some time or reboot once or twice. This is normal.

Tip: If you are stuck on the boot screen for more than 20 minutes, hold down the power, enter the boot menu again, and select the MicroSD card.
Step 6: Windows Setup & Orientation
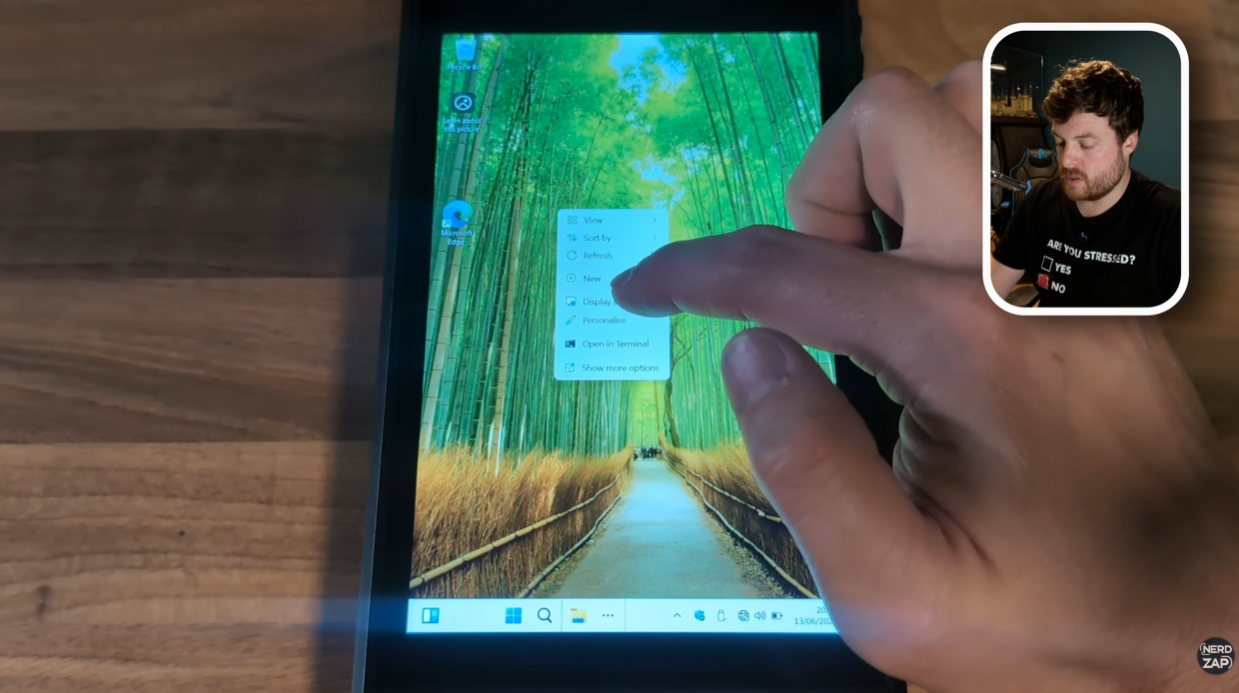
Windows will load in portrait mode. To fix this:
- Complete the basic Windows setup.
- Once on the desktop, long-press on the wallpaper to open the context menu.
- Select Display Settings.
- Change Display Orientation to Landscape.
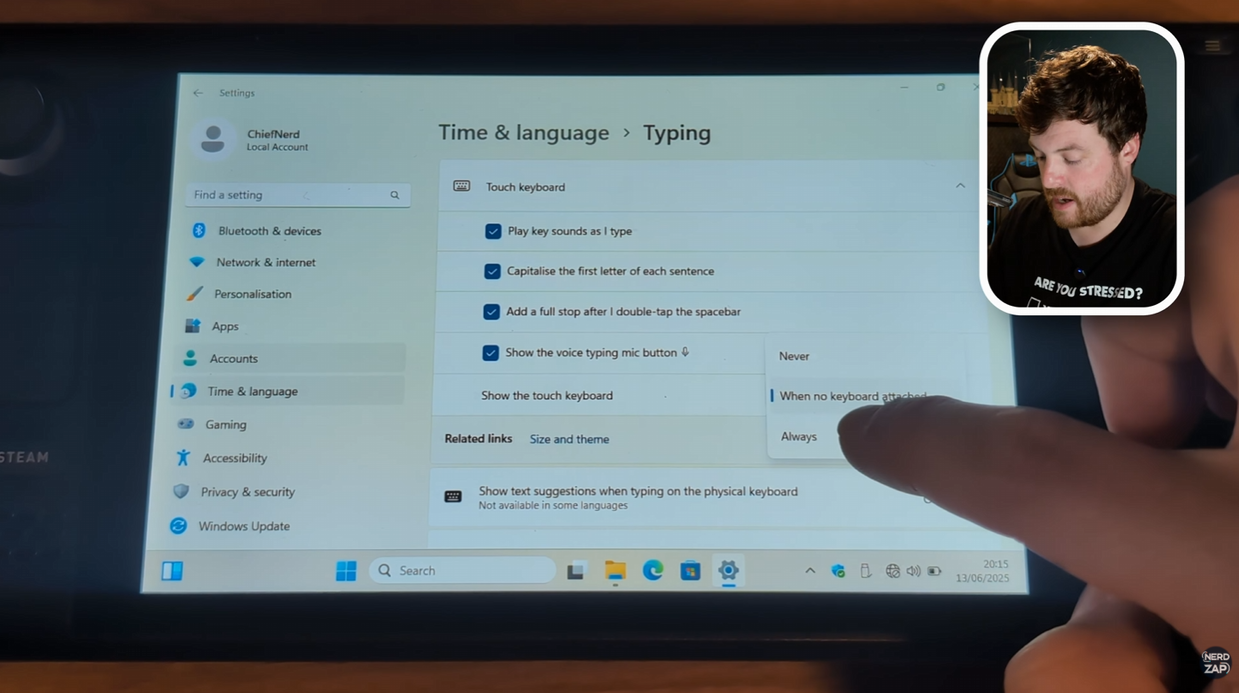
Step 7: Fix On-Screen Keyboard
To ensure the keyboard appears whenever you tap a text box:
- Go to Start > Settings > Time & Language.
- Select Typing > Touch Keyboard.
- Set the option "Show the touch keyboard..." to Always.
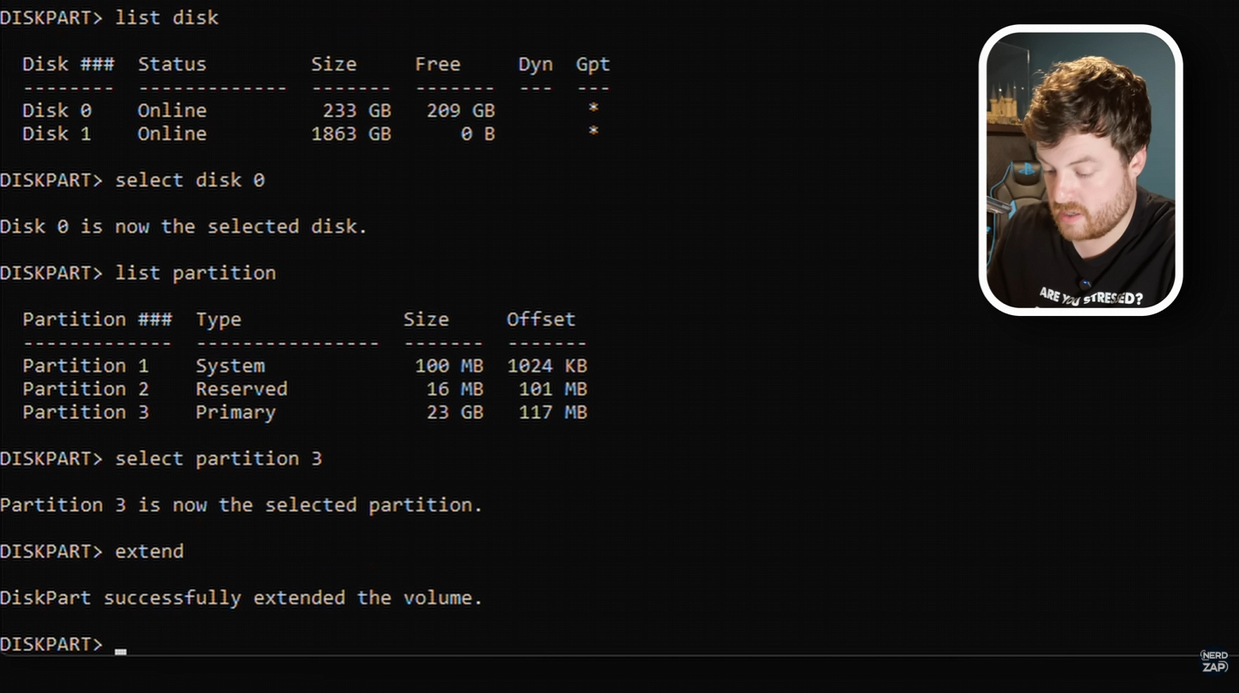
Step 8: Expand Drive Capacity
Windows may not see the full size of your SD card immediately. We must use PowerShell to fix this.
2. Type:
diskpart (Press Enter)3. Type:
list disk (Identify your SD card, usually Disk 0)4. Type:
select disk 05. Type:
list partition6. Type:
select partition 3 (The primary data partition)7. Type:
extendYou should see a message saying "DiskPart successfully extended the volume." You now have access to the full space of your card!